 Hello all , I thought to write an interesting post in IOS this time. It’s going to be a colorful application J No suspense…All what I’m going to explain here is about an image processing application in IOS. We all know what image processing means. Image processing is any form of signal processing for which the input is an image, such as a photograph or a set of characteristics or parameters related to the image.
I have been working on finding techniques to perform few takes with an image that is been selected from a UIImagePickerController . So, what I’m going to explain here describes the below tasks which I have already figured out how to achieve.
- How to pop up the UIImagePickerController in an iphone to select an image
- How to convert a UIImage to Grayscale
- How to convert a UIImage to Black and White
- How to resize a UIImage
- How to check whether a UIImage is black and white or not
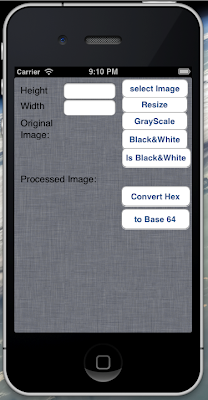
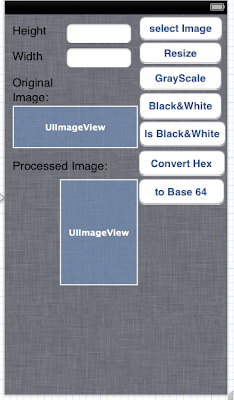
The application that I designed consists of a single view with two UIImageViews, each to display the image before processing and after processing. And I have a collection of buttons where each one will perform the image process and display the resulting image in the second UIImageView.
Following is the simple screen that I have created to perform all the above mentioned tasks. And please make sure that you have enough photos in you device or simulator’s photo library to test the functions correctly working. I recommend having images with different file extensions (.bmp, jpeg, png etc), sizes and colors.

#import <UIKit/UIKit.h>
@interface ViewController : UIViewController
<UIApplicationDelegate,UIImagePickerControllerDelegate,UINavigationControllerDelegate,UIPopoverControllerDelegate>
{
IBOutlet UITextField *getHeight;
IBOutlet UITextField *getWidth;
IBOutlet UIImageView *imageDisplay;
IBOutlet UIImageView *resultImageView;
IBOutlet UIButton *resizeImageBtn;
IBOutlet UIButton *convertGrayScaleBtn;
IBOutlet UIButton *convertBlackNWhiteBtn;
IBOutlet UIButton *convertMonoChromeBtn;
IBOutlet UIButton *selectImageBtn;
IBOutlet UIButton *convertToHex;
IBOutlet UIButton *convertToBase64;
UIImagePickerController *ipc;
UIPopoverController *popoverController;
UIImage *sourceImage;
UIAlertView *alert;
}
@property (nonatomic,retain)UITextField *getHeight;
@property (nonatomic,retain)UITextField *getWidth;
@property (nonatomic,retain)UIImageView *imageDisplay;
@property (nonatomic,retain)UIImageView *resultImageView;
@property (nonatomic,retain)UIButton *resizeImageBtn;
@property (nonatomic,retain)UIButton *convertGrayScaleBtn;
@property (nonatomic,retain)UIButton *convertBlackNWhiteBtn;
@property (nonatomic,retain)UIButton *convertMonoChromeBtn;
@property (nonatomic,retain)UIButton *selectImageBtn;
@property (nonatomic,retain)UIButton *convertToHex;
@property (nonatomic,retain)UIButton *convertToBase64;
@property (nonatomic, retain) UIPopoverController *popoverController;
@property (nonatomic, retain) UIImagePickerController *ipc;
@property (nonatomic, retain) UIImage *sourceImage;
@property (nonatomic, retain) UIAlertView *alert;
-(IBAction) resize:(id)sender;
-(IBAction) convertGrayScale:(id)sender;
-(IBAction) convertBlackNWhite:(id)sender;
-(IBAction) checkBlackAndWhite:(id)sender;
-(IBAction) selectImage:(id)sender;
-(IBAction) convertImageToHex:(id)sender;
-(IBAction) convertToBaseSixtyFour:(id)sender;
@end
and do not forget to put the below section in your implementation file.
@synthesize getHeight,getWidth,imageDisplay,resizeImageBtn,convertBlackNWhiteBtn,convertGrayScaleBtn,convertMonoChromeBtn,resultImageView,popoverController,ipc,sourceImage,selectImageBtn,alert,convertToHex,convertToBase64;
By the way, do you know how to add images to the photo library in a simulator?
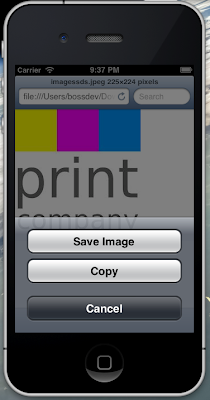
 It’s very simple. Keep few images in a folder and run the ios simulator in a side of the screen. You can be in any screen in the simulator. Drag and drop the images that you have (one at a time) on to the simulator’s screen. The image will be displayed on the screen. Click and hold the , mouse on the image for about a second where a popup will ask you whether you need to save the image. Select “Save Image” option where the selected image will be made available in your Photo Library from that point onwards.
I don’t think that I should explain you on how to create a view based an xcode project and create an interface as simple as above. If not sure, you can refer my previous blogs under the ios category. OK, following is my header file content. By the name means of the variables, it’s easy for you to understand what they are used for.
So, do not forget to bind the controls (the UIButtons and UIImageViews) with their declared variables and methods. I hope you can simply do that. Ok, let’s start the work now. For making the post simple for you to refer, I have made it a collection of posts, so, all what you have to do is simply click on the above links to know about the implementation of the task that you want to achieve.

No comments:
Post a Comment